Your first photorealistic render in SketchUp, from framing to final image
The full lesson: set the scene in the Scenes tab, generate the render in Studio and refine the image in the editor, without leaving SketchUp.
The AI renders exactly what it sees in your viewport. That's why the step that most influences quality isn't the prompt. It's scene preparation. The Scenes tab gathers every control for it, without touching SketchUp's settings.
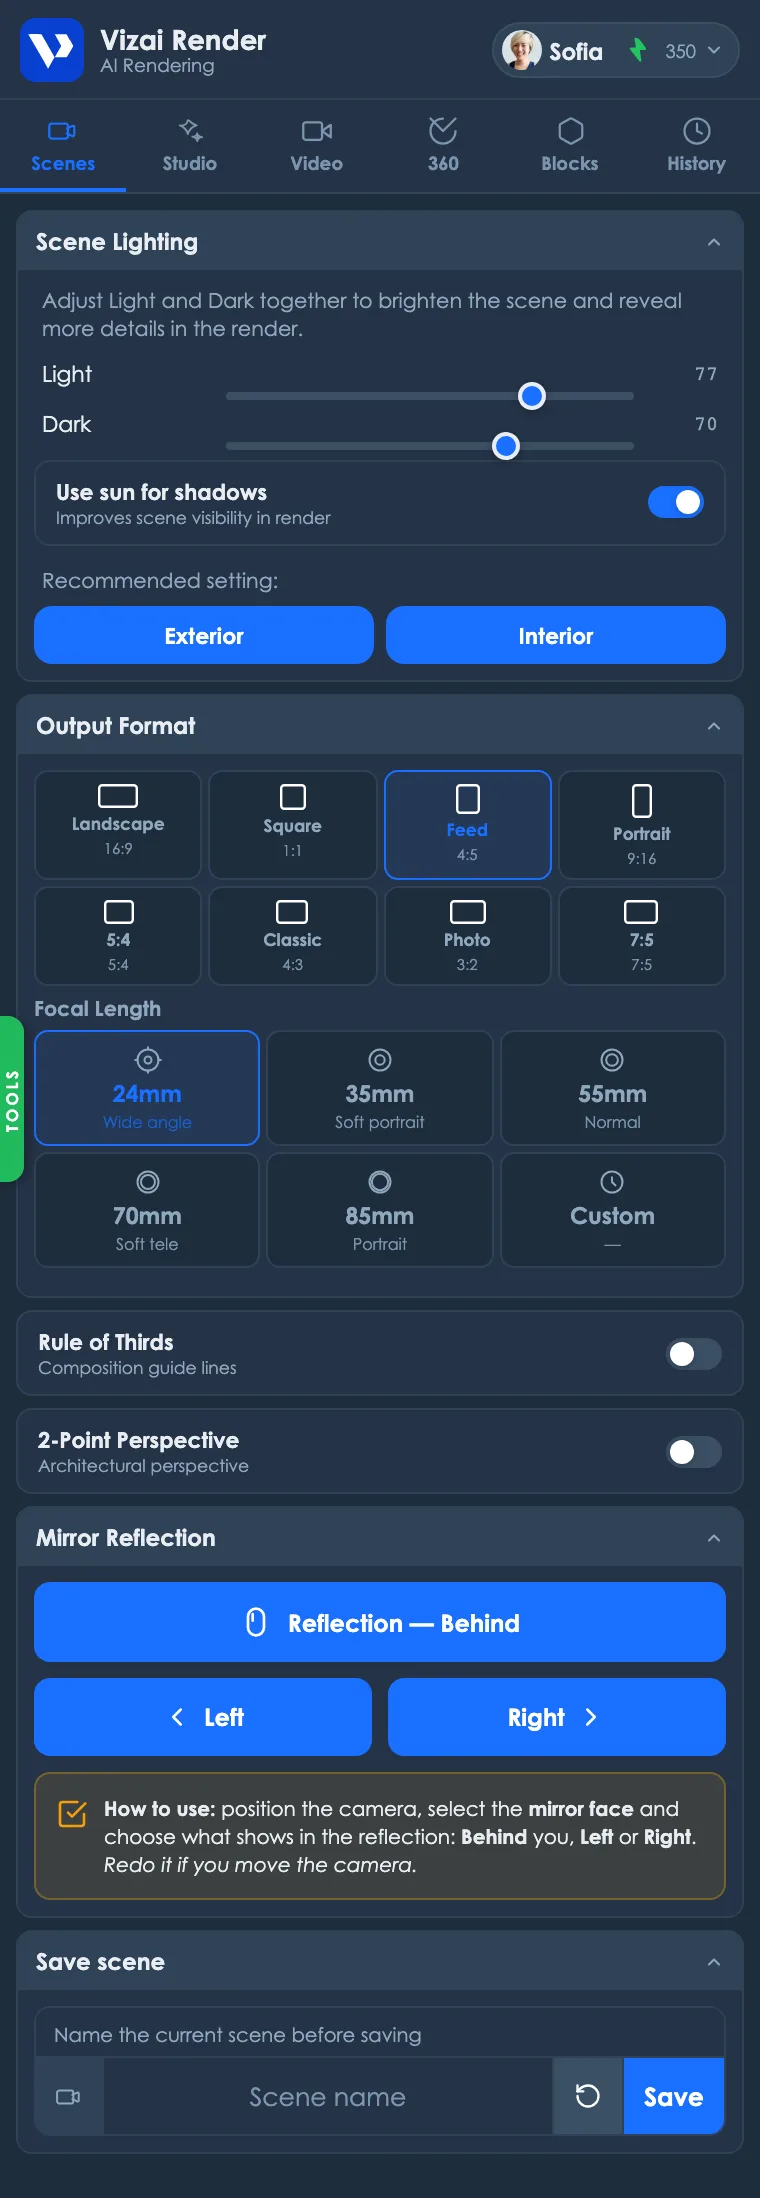
Scene lighting
The Light and Dark controls adjust SketchUp's shadows. Raise both together to brighten the scene and reveal more detail. The more the AI sees of your model, the more faithful the render. The Use sun for shading toggle improves how volumes read.
Don't want to think about it? Use the presets: Exterior for facades and open areas, Interior for indoor spaces. One click applies the recommended setup, and the plugin restores your file's original shadow settings when you close the panel.
Output format
Choose the final aspect ratio before rendering: Landscape 16:9 (presentations), Square 1:1, Feed 4:5 and Portrait 9:16 (social media), plus 5:4, Classic 4:3, Photo 3:2 and 7:5. The viewport shows the crop mask in real time. What's inside is what gets rendered.
Focal length
Focal length completely changes how the space reads: 24mm (wide angle) embraces small interiors, 35–55mm are neutral and realistic, 70–85mm compress the perspective like a professional detail shot. There's also a Custom mode to set the value manually.
For residential interiors, 24mm to 35mm is the architecture photography standard. For facades, try 35mm to 55mm from further away. It distorts verticals less.
Composition guides
- Rule of thirds: overlays photography's classic guide lines on the viewport, so you can place points of interest on the strong spots of the frame.
- 2-point perspective: activates SketchUp's architectural perspective: every vertical stays perfectly straight, the standard in professional architecture photos.
Saving scenes
Found the perfect angle? Name it and click Save. The scene is created in SketchUp so you can return to it anytime. Save your 3 or 4 main angles before rendering: it makes generating the project's full image series (and redoing tweaks later) much easier.
With the scene saved, it is time to generate the first image. Everything happens in the Studio tab, and it takes less than a minute.
With the scene prepared, rendering is just following the 5 numbered steps in the Studio tab, in Render mode. In seconds the AI returns a photorealistic image of your exact viewport angle, preserving your design. Geometry, materials and composition.
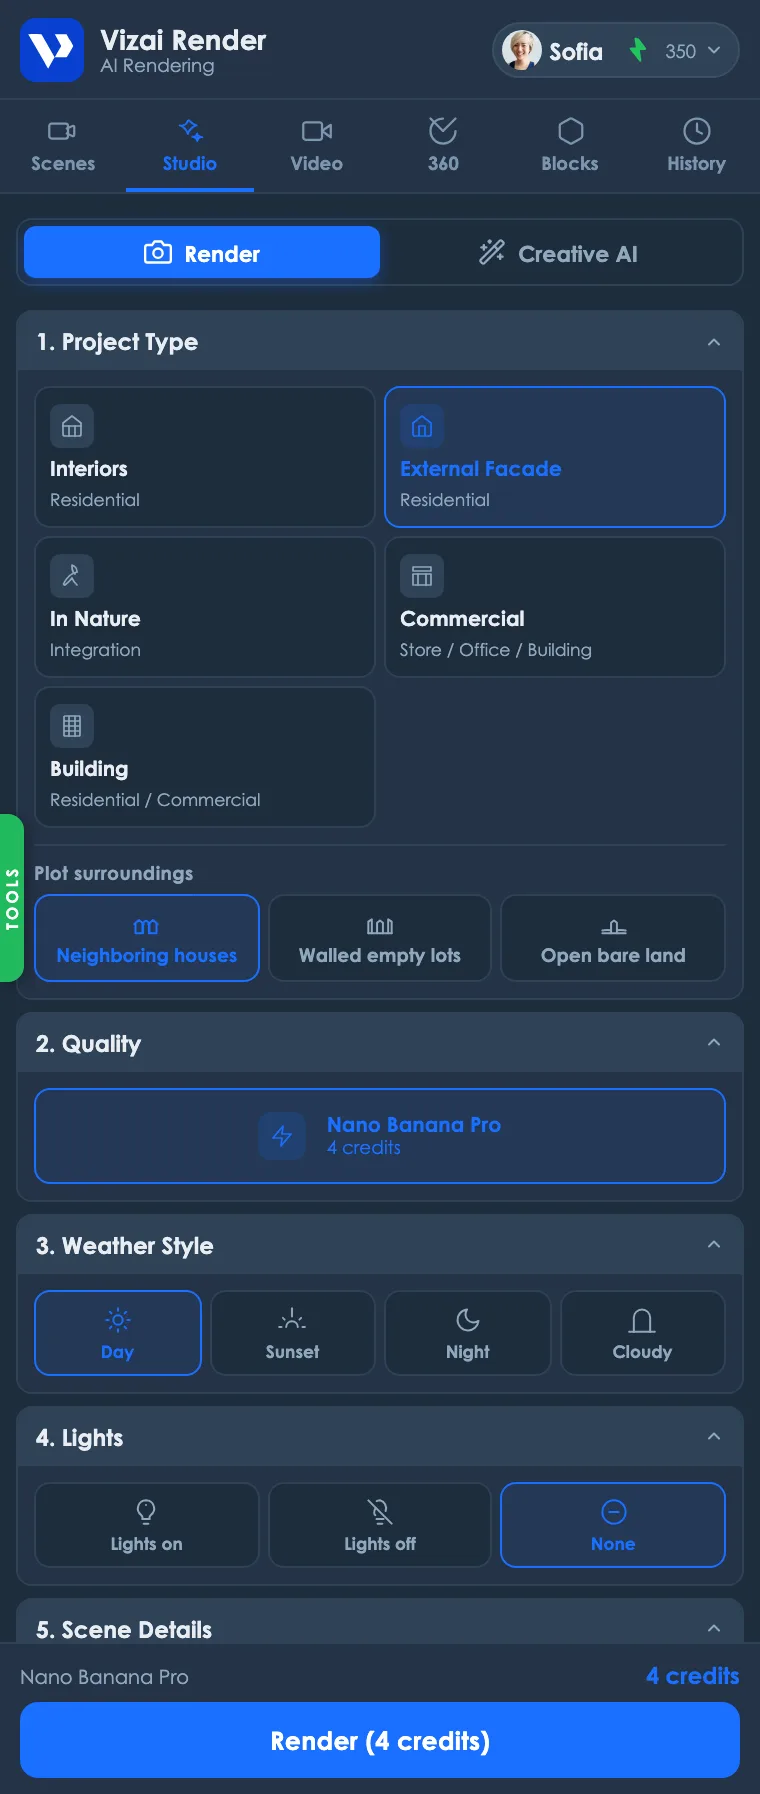
The 5 steps
- 1Project type
Tells the AI what it's looking at: Interiors, Exterior Facade, Set in Nature (landscape integration), Commercial (store, office) or Building. Each type gets specific lighting and context treatment. Picking Exterior Facade reveals a second choice, the plot surroundings: Neighboring houses (the default — one house on each side, matching your project's standard), Walled empty lots (vacant plots with a boundary wall or fence) or Open bare land (open ground, no walls or fences).
- 2Quality
Vizai's image engine (Nano Banana Pro): each render costs 4 credits.
- 3Weather style
Day, Sunset, Night or Cloudy. Sets the sky, light temperature and overall mood of the image.
- 4Lights
Lights on (nighttime interiors or cozy spaces), lights off, or None to let the AI decide what's natural.
- 5Scene details
Optional free-text field to guide the AI: materials, vegetation, atmosphere. It's automatically merged into the prompt.
The result
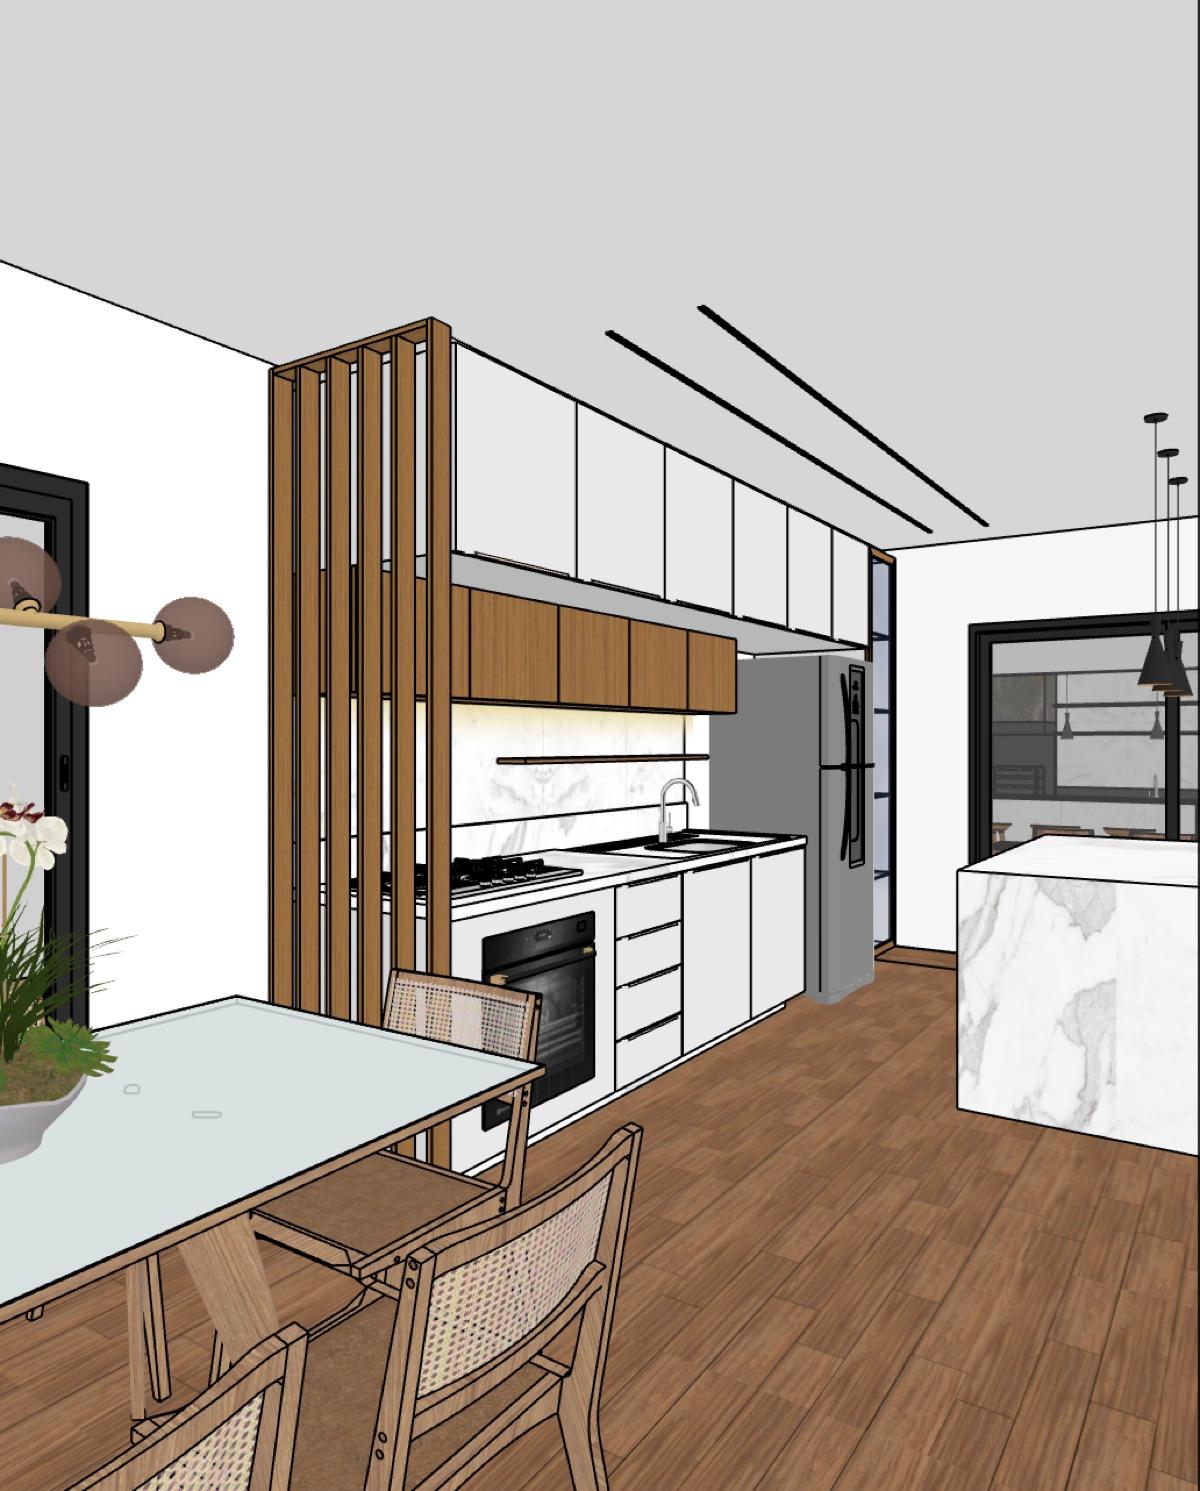 SketchUp model
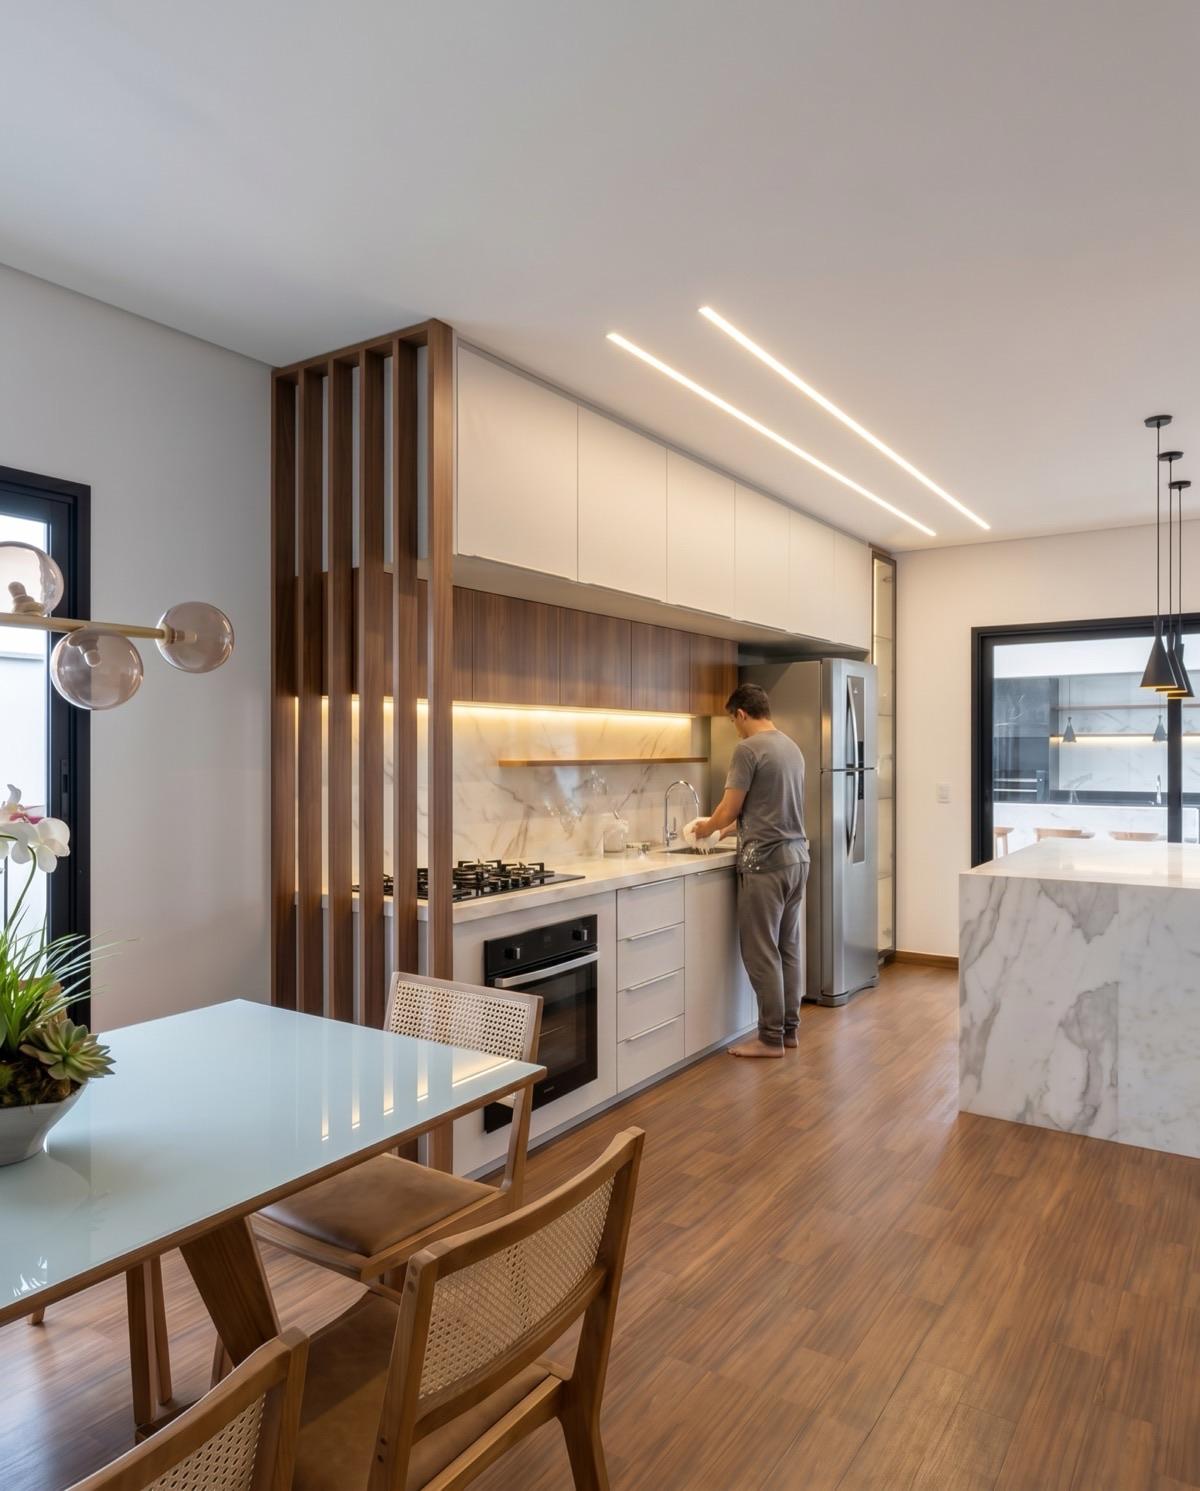 Vizai render
The render appears right in the panel with the Before/After control to compare against the original model. Full screen included. From there you can Download the image, open the Editor to refine it, or Export in high resolution: the standard download is free, and the 4K upscale costs 5 credits.
Writing good scene details
The details field doesn't need elaborate sentences. Comma-separated keywords work best. Describe what the AI can't guess from the model:
- Specific materials: “satin porcelain floor, freijó wood joinery, white quartz countertop”.
- Vegetation and surroundings: “tropical vegetation, trimmed lawn, tree-lined street”.
- Atmosphere: “soft late-afternoon light, cozy ambiance”.
Apply real textures to the model instead of leaving it all white: the AI respects the materials it sees. Textured model + short prompt details = the most faithful result.
If the render comes out dark or with “invented” areas, go back to the Scenes tab and brighten the lighting. The AI usually just couldn't see that part of the model.
The render is done, but you do not have to settle for the first result. The Edit window lets you fix a detail, create new perspectives and adjust the image without spending another render.
Got a good render, but the sofa looks off? Want the same room from another angle, or a close-up of the countertop for a presentation? That's what the Editor is for. Click Edit on any render and it opens in a dedicated window with three tabs: AI Editing, Crop and Adjustments.
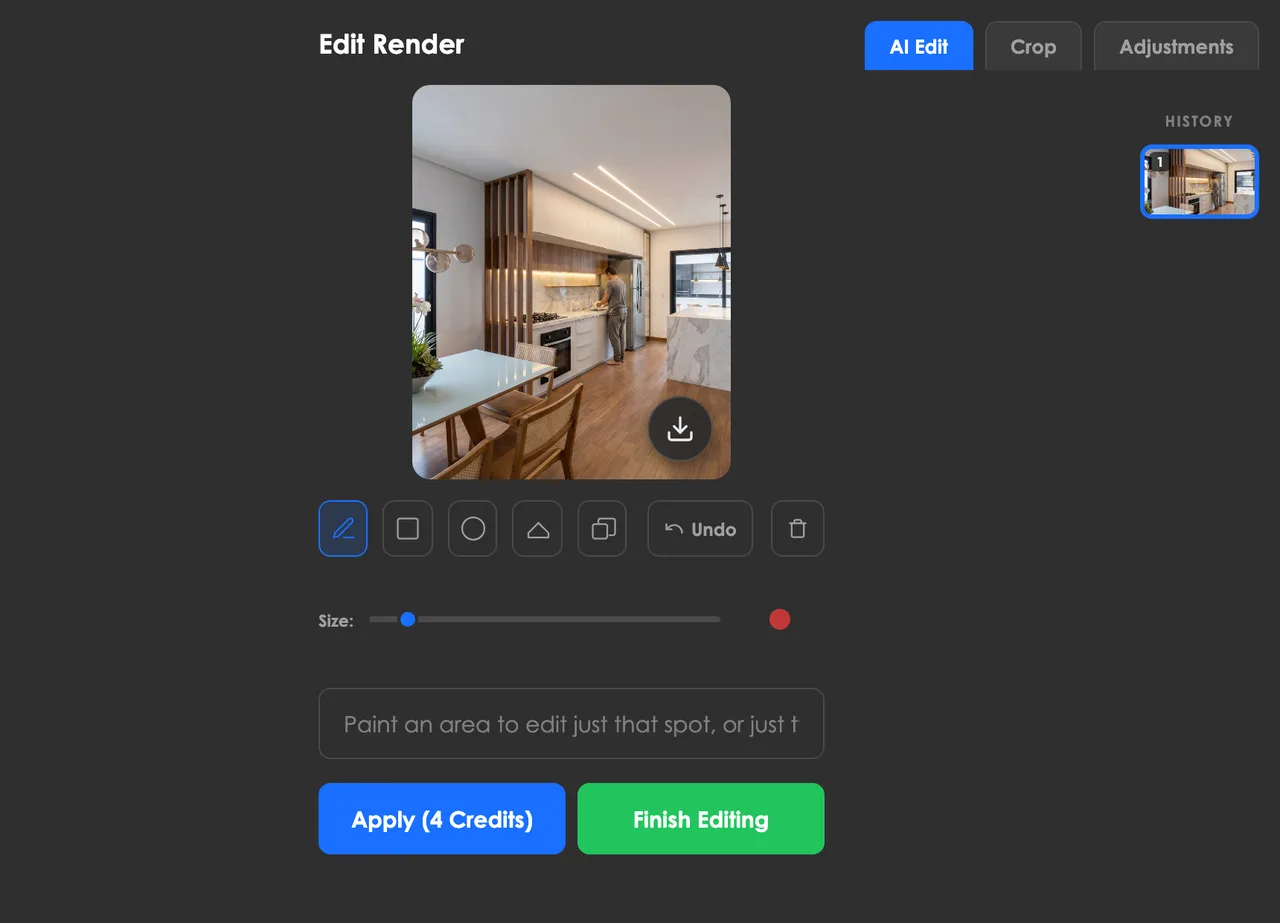
AI Editing (inpainting)
Inpainting lets you change just one area of the image while keeping everything else intact. Paint the region you want to change and describe the edit:
- 1Mark the area
Use the Brush (with thickness control), Rectangle or Circle to create the mask. Made a mistake? Eraser, Undo stroke or Clear mask.
- 2Describe the change
“Replace the sofa with a beige linen one”, “remove the car”, “add framed art to the wall”… The AI edits only the marked area.
- 3Apply and compare
Each edit costs 4 credits and joins the side history. Navigate between versions and hold the Before/After button to compare with the original.
With no mask at all, your command applies to the whole image. Handy for global changes like “make it nighttime” or “change the wall color”.
New perspectives: several scenes from one render
This is one of the Editor's most powerful features: ask for another angle of the same space right in the text field, without moving the camera in SketchUp and without spending a brand-new render. The AI understands the intent of your command:
- “Close-up of the armchair”: mark the armchair (or just type it) and get a tight detail shot, with materials and lighting preserved.
- “Side view of the room” or “new perspective showing the kitchen from the right”. Generates the same space seen from another point.
- “Drone view”: pulls the camera up and away for an aerial shot.
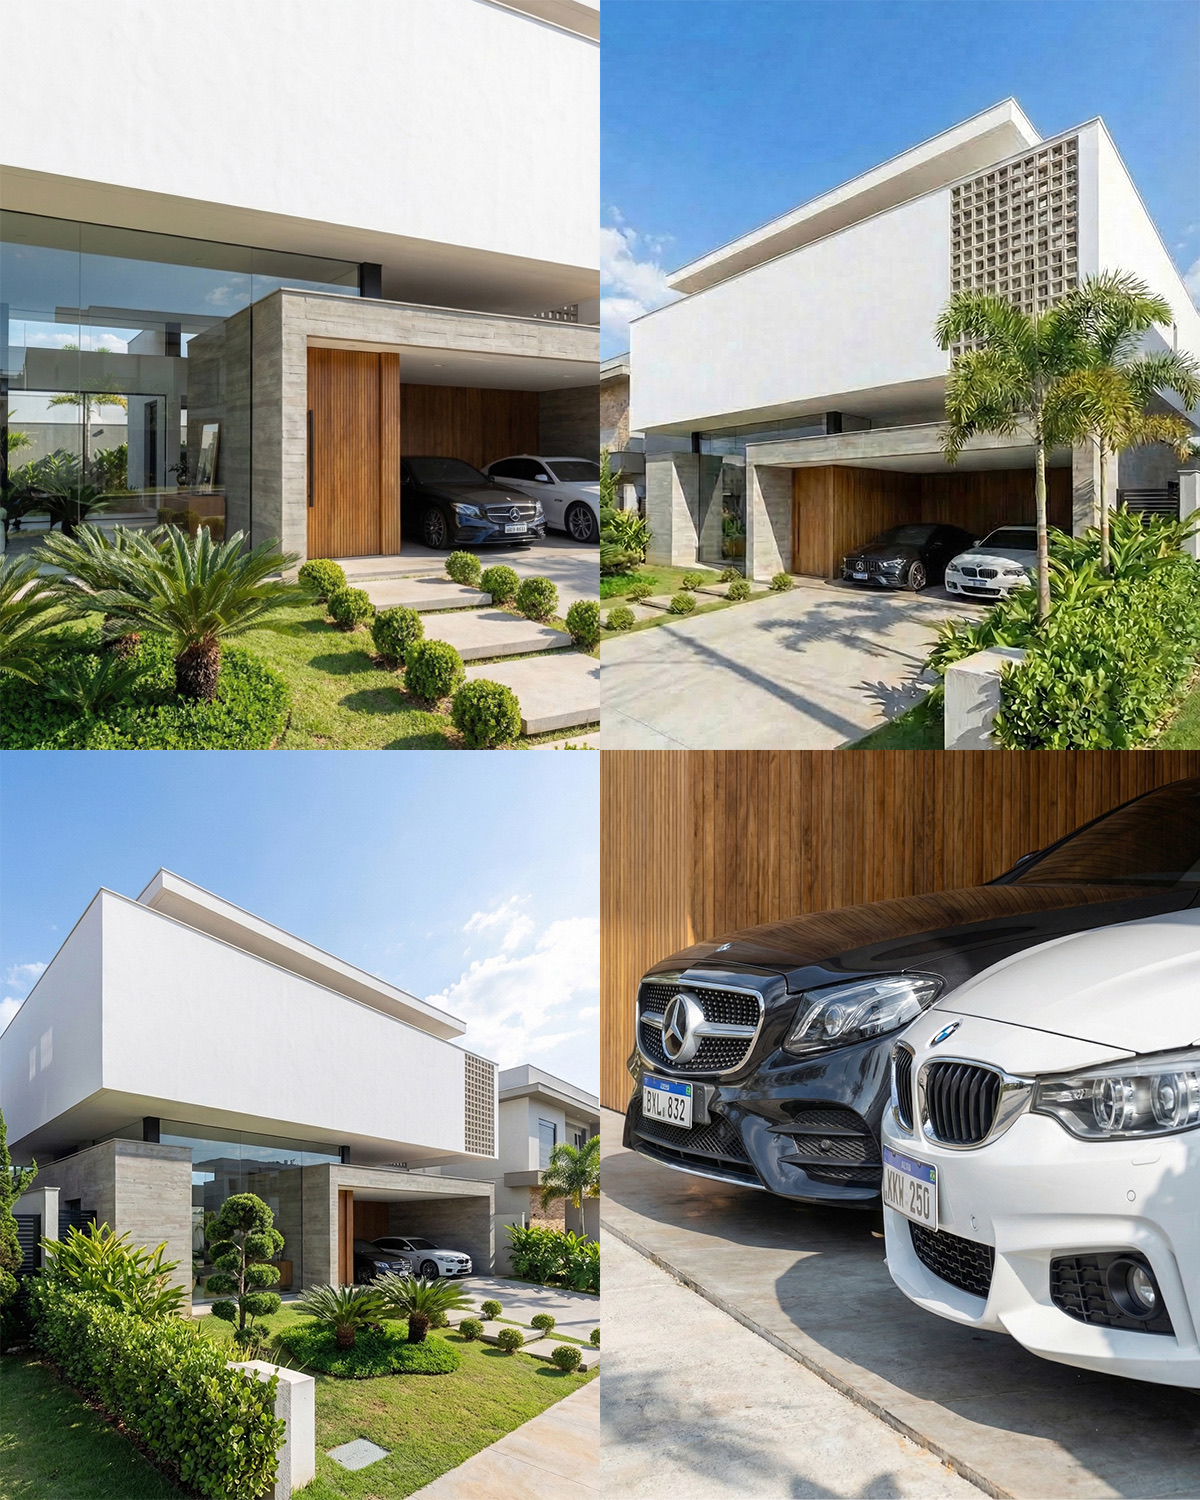
In practice, a single 4-credit render becomes the basis of a complete presentation: generate the overview, then ask for detail close-ups and alternative angles at 4 credits each, much faster than repositioning the camera and re-rendering every view.
Crop and Adjustments (free)
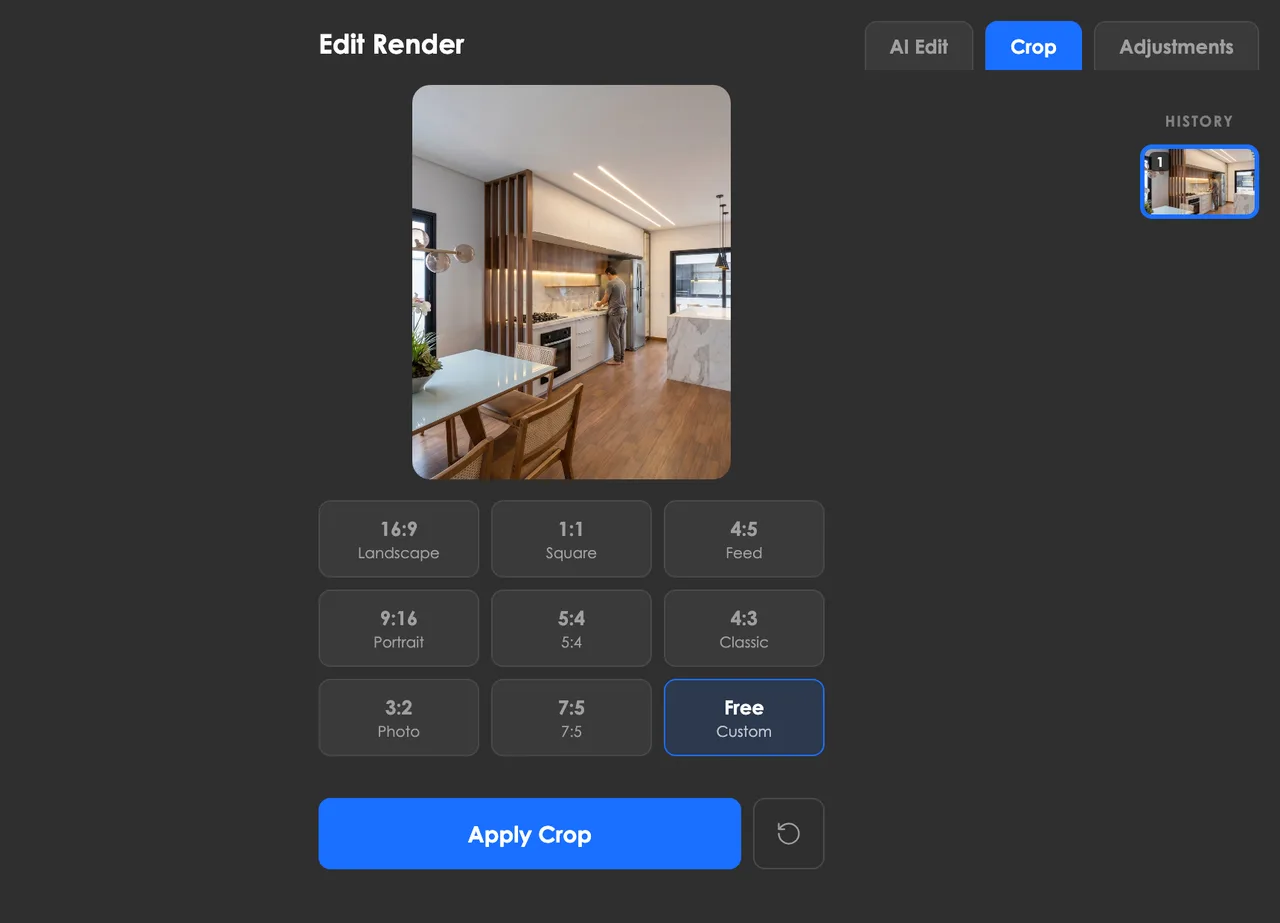
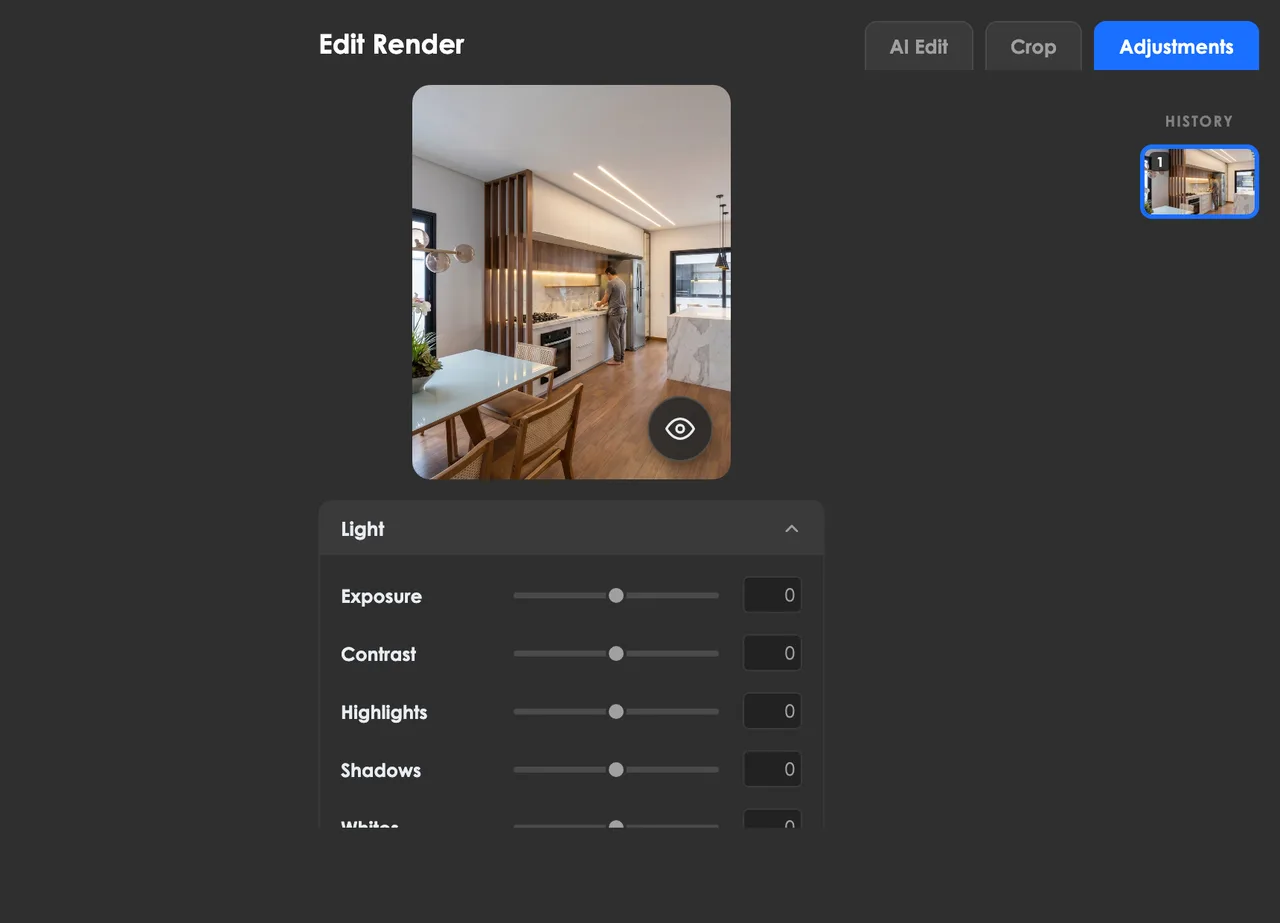
The Crop tab reframes the image to the plugin's ratios (Landscape, Square, Feed, Portrait, Classic, Photo) or free/custom crops. The Adjustments tab finishes it like a photo editor: brightness, contrast, saturation, exposure and temperature. Both are completely free, as is the 2K download.
Clicking Finish Editing sends the final version back to the main panel, ready to become a video, a 360 or a 4K upscale.
Ready to try it yourself?
Create your account, install the plugin and get 8 free credits on your first login.